Showing posts with label One Room Challenge. Show all posts

3.20.2013

One Room Challenge: The Final

 photo orc1_zps19eb01da.jpg

The end is here!  Woah, I never thought I would be saying those words, but it really is the end of this 6 7 week challenge.  I am grateful to Linda for talking me into doing this challenge again! She really knows how to get my butt in gear.  Thank you Linda!! 

My little rental apartment kitchen finally got the personal makeover it deserved for close to 5 years.  Like I said when I started this project, just because I live in a rental doesn't mean it shouldn't feel like my own.  I should have done this straight from the beginning, regardless if I thought I was only going to be here for 2 years.  Not owning this place it made major renovations not realistic.  This makeover had to consist of paint, fabric, and accessories. 

Lets go back to where I started.  The first picture (on the left) is going wayyy back, back to the first week I lived here.


 Bar cabinet & armoire before

under the sink and the mess before

If you want to start back at the beginning check out the previous weeks here

The rug was purchased about 2 years ago and was the jumping off point for this makeover

I actually stuck to the original plan and used everything here.  

OK enough talking already, here is my new kitchen 
(warning, photo dump ahead)


And that's a wrap!  

7 weeks of planning, projects, paint and hark work has paid off.  With a few personal details, paint and creativity my rental apartment is no longer a place I avoid at all costs.  I might actually put some of those pots and pans I have to use and cook a nice dinner for my husband.  

Who am I kidding, I'll put the newly painted take out menu drawer to use and order us a nice celebratory dinner.  

Thank you so much for coming back each week to check in on my little kitchen makeover.  I had much fun tackling this project that I can't wait to start the next one.  After a little R&R of course.
Now I'm off to check out the other 19 bloggers and their final reveals, I can't wait to see how all the rooms turned out!


3.13.2013

One Room Challege: Week 6

Photobucket

So apparently I cant count, or keep track of weeks, because this week is week 6 but not the final yet.  I included our Intro post in the count and got myself all messed up.  Anywoo, next week is the finale and I still have the same amount of work left to do, oops!  To check out previous weeks, head here. 

While I didn't accomplish anything huge this week, I got a few of the details finished.  The projects had been on my to-do for a long time so I was glad to cross them off. 

First up was painting the handles of those inexpensive wood Ikea utensils.  The project has been around the blog/pinterest scene for awhile, same with the packs of utensils I had sitting in my armoire for months! My kitchen makevoer was the perfect reason to finally get this project done.


So easy, I don't know why I didn't do it earlier!! 

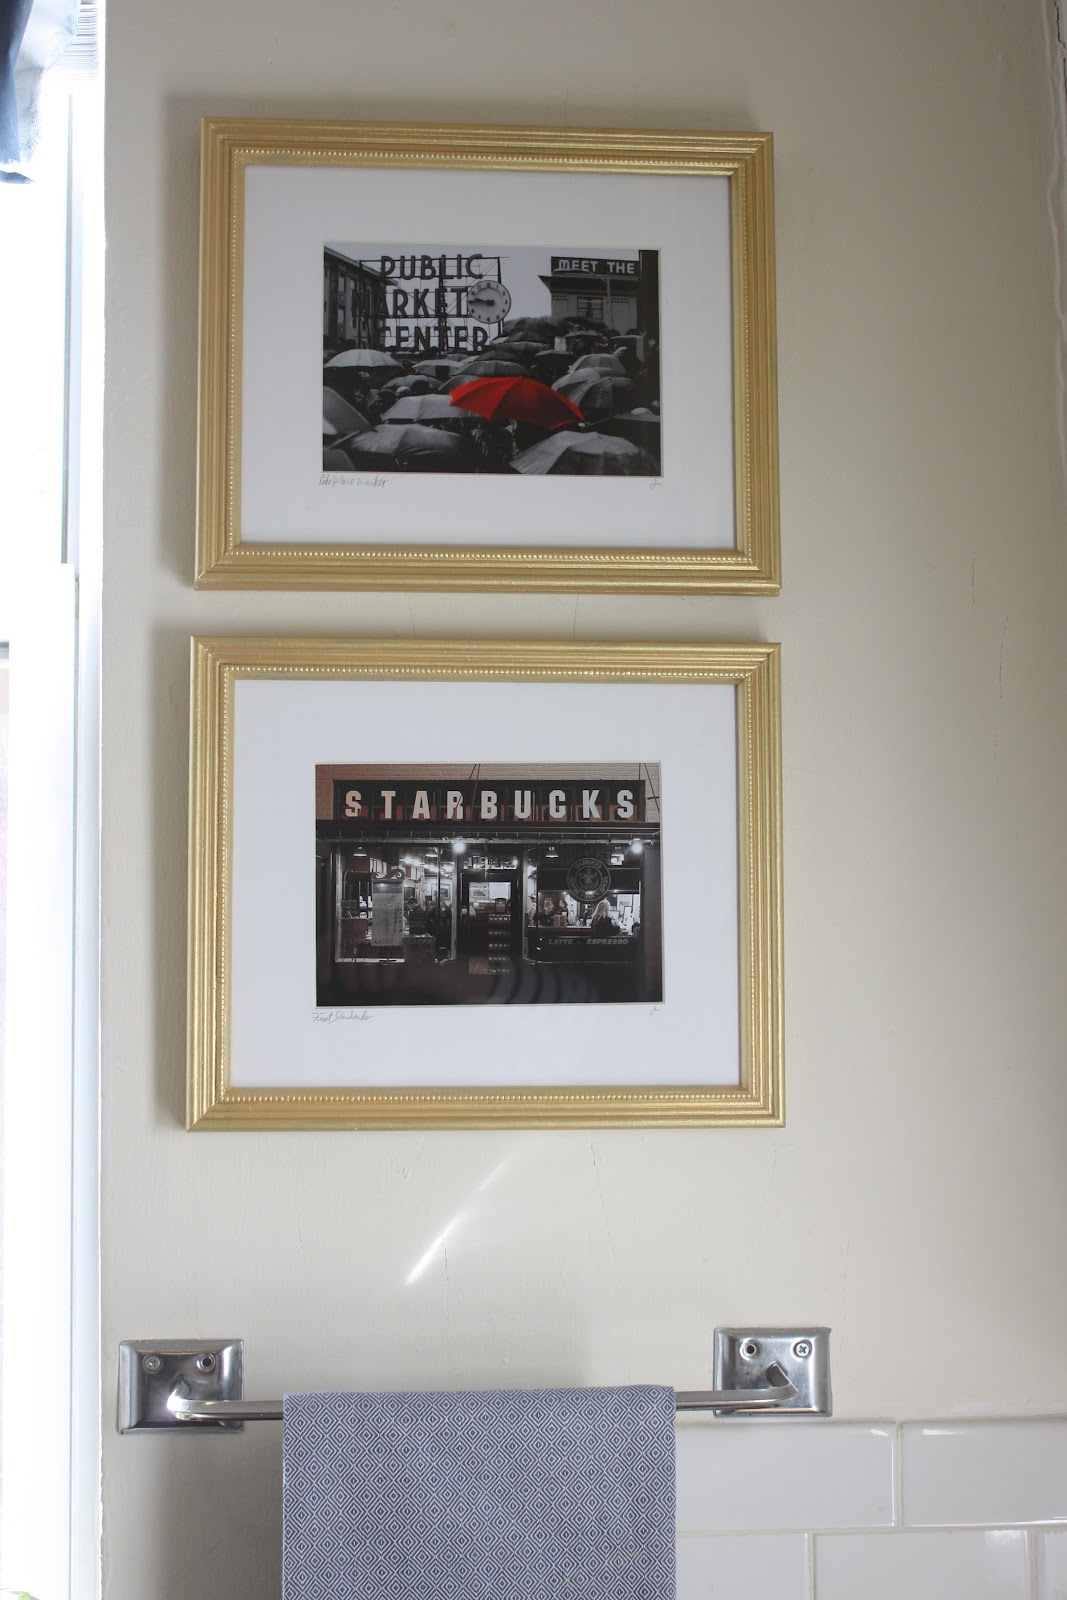
Next up was some art for the window wall.  It was sad and naked. 


A few months ago my husband brought home two photographs he picked up in Seattle on a business trip.  He knows how much I love coffee and seafood so he bought two Pike Place photos from a local artist.  I thought it was so cute he picked them out that I couldn't help but want to hang them somewhere. 

I also happened to have two frames from a project gone wrong during the last One Room Challenge.  After a coat of paint it was a perfect match.


Thrift Store frames with a coat of gold paint are always a good idea in my book. 

Only one more week to go, and boy do I have some major projects to finish.  I know I said that last week, but I really mean it this time.  I should have taken advantage of the bonus week, but of course life and procrastination got in the way. 

In the meantime go check out what the other One Room Challenge bloggers have been up to this past week!


3.06.2013

One Room Challenge: Week 5

Photobucket


Week 5 is here and the end is near.  But not here yet, that's for sure.  I feel like I've come so far, but I still have a few major hurdles to go.  (If you want to catch up on past weeks check out: week 1, week 2, week 3 and week 4)

Last week I showed you my bar cabinet, and boy has it been one of the best makeovers in my apartment.  But a close second might be the extra storage armoire, which also happens to be in my kitchen.  After my wedding two years ago I had so many amazing new things and no place to put them.  

I picked up an antique armoire on craigslist to fill the storage need in my kitchen. The storage was a welcome addition.  I bought it over a year ago and since then it sat stuffed to the gills and looked like this


Honestly I don't think I ever opened the doors.  I was scared what I was going to find and figured I would never find what I was actually looking for.  

There was no other place to start other then taking everything out and starting fresh


I took off the doors and gave the inside a coat of primer.  I like primer because it not only covers any stains or knots that might be in the wood, but it also means less coats of my final color.  

Can you see the mirror on the right door?  It had to go.  I used lots of duct tape over the surface to prevent injury in case it did shatter upon removal.  I also wore safety goggles sunglasses and heavy duty work gloves old leather winter gloves, safety first!

 
The key here was removing it without cracking the mirror.  I do not need 7 years of bad luck in my future.  This frameless mirror was attached directly on the plywood using heavy duty mounting tape.  Meaning it was not going to be an easy job.

Oops the surprise is over, you can see the pretty color I painted the inside here!

Using my hairdryer to heat the mounting tape, I used a wire attached to two spoons to shimmy between the wood and mirror to remove the mounting tape.  

It took some muscles, but it came off in one piece.

I filled in some of the holes, chips and imperfections with wood filler, sanded the doors down and got ready to paint.

All finished! (don't mind my ironing board)

I went with the BM Habanero Pepper for the inside of the armoire and I love how it came out.  It's a reddish color with hints of pink, orange and hotness. 

Since I took everything out for this project I used the opportunity to wash and organize it all before I put it away again.  It's not all back together yet, so be sure to check back next week to see how it turned out.

Oh and next week also happens to be the final week, so all the little projects and crafts will be finished. I can't believe I have 1 week left!!

Be sure to check out the other 19 bloggers and see how their 5th week went


3.01.2013

Paint by letters

Since starting my One Room Challenge I've had a constant paint workspace set up in my apartment.  You know, paint everywhere nothing put away and some project or another always in the works.

When I had the yellow Yolk paint out last week for my bar makeover I decided that something else in my kitchen needed that bright color.  My pen/pencil/scissor holder was the perfect thing.  Awhile back I had given a plain white pencil holder a makeover with marbled paper.  Here is what it looked like
I really loved that paper, but it just needed something new and fresh for my One Room Challenge. 

I sanded it down a bit, gave it a coat of primer (remember I had already tried painting Yolk over Gentleman's Gray and it didn't go so well) and then multiple coats of Yolk.  I honestly don't even remember how many, that color requires lots of coats to get the full color goodness.

Once it was painted and dry I decided it needed a personal detail and there is no other personal detail I love more than a monogram.


Obvi I forgot to take a photo of it before I started the monogram, but you get the idea.  I used my magic pencil lead trick to transfer the monogram on.  Once I liked how it looked I painted in the lines with basic white craft paint.

After the white paint dried, I gave it two thin coats of water based polycrylic and I was good to go


All finished and holding my very favorite LePens like a champ. 


Have a good weekend everyone!

2.27.2013

One Room Challenge: Week 4

Photobucket

Back again with progress on my One Room Challenge.  Its week 4 around here and things are starting to fall into place. 

Fall?  Who am I kidding, I worked damn hard for those pieces to come together.  No magic wand here. (If you are a new here, welcome! To see where I started check out Week 1, Week 2, Week 3)

Since its just passed the halfway point I figured it was time to get that bar cabinet in order.  I mean, where else do I turn after a long day of working on my ORC projects? 


The previous tenants used this cabinet for cereal and other snack items. But I knew it was made for a much more important job. The pretty glass doors were the perfect frame to show off something important.  When I first moved in I just threw whatever I had in there and let it be.  I didn't really organize it or make it pretty, it was a working cabinet after all. 

Then a few years ago I was feeling crafty and I painted the back of it a bright turquoise.  You cant really tell in the photo above, but you can see that project here

The turquoise obvi didn't go with my new color choices for the kitchen so it had to go.  Without even thinking I got out a can of Gentleman's Gray and painted the inside.


I realized it was WAY too dark and I would never be able to find what I needed in there.  Back to the drawing board, I narrowed it down to Yolk and Habanero Pepper.  You can see the two different samples above.

I settled on Yolk.  It was bright and happy, kind of like a school bus yellow with hints of green. It's a wannabe Citron color.  It was the perfect choice!


Ta-da!

Its a difficult color to photograph.  In person it is perfection, I LOVE how it came out.  But a word to the wise, if you are painting a light color such as Yolk over a dark Gentleman's Gray, do yourself a favor and use a primer first.  Lesson learned the hard way here.

After cleaning out the almost empty bottles of booze I had room for all the drinkware I've collected.


No bar is complete without mixers.  My Favorites are tonic, club soda, a flavored soda, and grapefruit Perrier.

While I was waiting for the paint to dry between coats, I got to thinking what else I could paint this lovely shade of wannabe citron. The loan drawer in my kitchen was the perfect choice. 


 A botched fix-it job by the landlord left a less than desirable look with that dried glue. It needed to go.


And go it did. The single working drawer in my kitchen was now a surprise waiting to be found. 


Every time I open the drawer now its like an instant smile.


I was so happy with how it came out that I couldn't just leave the one other drawer in the kitchen alone.


It's the one other drawer in my kitchen.  It just happens to be above the liquor cabinet so of course it should match.


Only one more major painting project on my to-do list and I'll show you what that one is next week.

In the meantime go check out what the other 19 bloggers are working in their rooms