
Last Monday I posted about a paper mache tray I was working on without having actually finished the project. I was a little nervous that it would not turn out how I hoped, but all my nerves were calmed when I finished the last coat of lacquer and was left with a beautiful tray for my nightstand.
To re-cap this is what I started out with

a pile of scrap computer paper cut up in strips, ready to get my paper mache on.
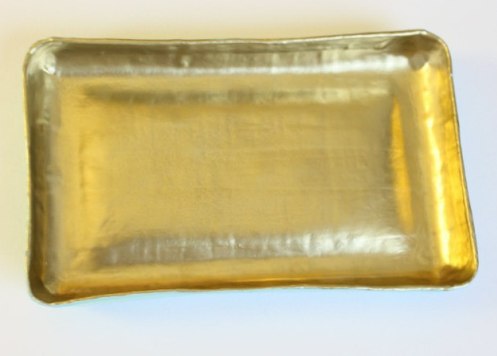
And this is what I had when I finished

the perfect size tray to hold lip balm and other odds and ends next to my bed

I decided to paint the inside gold - to give it a smooth look I gave it a few coats
(which is why this project took awhile, I let each coat of paint dry 24 hours)
The outside of the tray got a coat (or 5) of light turquoise paint.


After letting the whole thing dry for 24 hours, it got a few coats of my favorite Rustoleum Clear Lacquer spray paint.
After waiting for it to dry again, it was ready to use!


You really can turn trash into treasure with a little creativity, some glue & paint, and of course time.

This was such a fun project I'm wondering what else I can make with some strips of scrap paper.
Hope you all had a lovely weekend!
how about a cup or a bowl?
ReplyDeletelove the tray!
pve
would you ever consider something like this in a tutorial video or a giveaway? i love it....and feel inspired to make something....with papier mache.
ReplyDeletepve
It's soooo pretty! I would love a tutorial!! I'm dying for a good craft!
ReplyDeleteBeautiful! Oh I love this idea! BTW, I those same tortoiseshell bangles.
ReplyDelete-Rene
That is simply fabulous!! Love the color combo...Janell
ReplyDeleteLindsey! Your little tray looks so expensive! What a great project! Perfection on the color choice.
ReplyDeleteThat is AWESOME! Love the turquoise and gold!
ReplyDeleteyou are awesome. seriously, SO cute. i may need to try this for my new bedside table!!
ReplyDeleteThis turned out beautifully.
ReplyDeleteBravo, Alcira
thenerochonicles.blogspot.com
Love how your tray looks, very chic! xo
ReplyDeletesuper super cute, I keep a little ice cream dish next to my bed for the same purpose :)
ReplyDeleteIt looks so great. I'm amazed!
ReplyDeleteI love this idea, thank you so much for sharing, I have been dying for the perfect little (& inexpensive) nightstand tray, cant wait to try this!
ReplyDeleteSo chic! Love the colors!
ReplyDeleteWOW! That's amazing. I love the colors you chose. It looks like your hard work (and time) were rewarded!
ReplyDeleteawesome project! thanks for sharing.
ReplyDeletexo.
so cute! i love the color combination. how did you get it so smooth?
ReplyDeleteIt turned out great! I love the gold/turquoise combo.
ReplyDeleteholy smokes! this looks incredible!
ReplyDeleteVery Chic! love the gold!
ReplyDeleteOh you can make a bowl, a lamp...
ReplyDeleteSooo many different projects in mind;)
This one looks veery cute.
Nice job girl,
please come and visit my blog:
http://pudel-design.blogspot.com/
Lovely greetings...
gorgeous!
ReplyDeleteYou turned those scraps of paper into that tray? Impressive. I think I would need a little more than a tutorial...maybe someone to do it with me? Lovely.
ReplyDeleteBest,
Colleen
The color combo is awesome!!! Love it!
ReplyDeleteLove the metallic you went with -- it came out great!
ReplyDeletebrilliant! and i'm totally stealing your idea. HA!
ReplyDeleteLove your tortoise bracelets, I have some too! Great DIY; you're blowing me away with your tray skills!
ReplyDeletewow! that turned out beautifully! I think you should sell them on etsy! love the gold interior!
ReplyDeletejoan
Oh my gosh!!!!!!!!! Can you please start making these and selling them? I would die for a gold and cream one.. please :) :) :) xo
ReplyDeleteGORGEOUS!!! I can't believe how pretty it is :) Way to go!!
ReplyDeleteYou just may be the queen of trays!
ReplyDeleteYes, yes, YES! I think a full tutorial is in store - I. LOVE. IT!!
ReplyDeleteIt's absolutely gorgeous and looks very expensive! Thank you for the inspiration. Love the color combination too!
ReplyDeleteSo! Are they in the etsy shop yet?!?! :) I could start my christmas shopping!!!
ReplyDeleteWow, this turned out beautifully. It's like art class for adults.
ReplyDeleteAdded bonus, you used recycled paper! Good for you!
I just went back to the original post and saw this used to be a takeout tray! Now, I'm REALLY impressed. Who would've thought it would looks so good!
ReplyDeletePatricia, anything for you!! I need to make another one and work on a tutorial since so many of you asked :)
ReplyDeleteI looove how this turned out!!
ReplyDeleteGorgeous! Would you believe it if I told you I have those exact same bracelets and lip salve. Identical!
ReplyDeleteThis such a lovely little tray. I adore the gold:)
ReplyDeleteAmy R.
you are brilliant. I want one :)
ReplyDeleteJust this very day I was trimming a stationery order and thought, "Wonder what I could make with these little scraps?" I didn't have any clever ideas, so they landed in the recycling bin, but i should send them to you so you can make bunches of these and sell one to me! ;)
ReplyDeleteIve already told you I loved this project but just wanted to drop by to tell you I featured it on my blog today. Thanks again for genius idea.
ReplyDeleteGreat tray but I would have liked to see the steps you went through to form it.
ReplyDeleteWhat a clever lady you are!
ReplyDelete*bisous*
Dane
Very pretty! I have wanted to take a class at PaperSource that does this to make little bowls- but it looks like I could figure it out based on the steps you have shown - awesome!
ReplyDeleteThe tray is beautiful!
ReplyDeleteCould you please post a list of the items you used to make it? Brand names and all. I am a non-crafty person but I'd love to attempt this, if I could find the right products.
Thanks!
That tray is BRILLIANT. Good on you for figuring it out. Please, please, pretty please do a tutorial on how to make one? I pretty much NEED to make this before the holidays... or could you sell them in that exact color combo so I can buy it from you? :) Also, LOVE the light blue paint. Do you mind sharing the color? Sorry to poach all your good ideas - they're just too amazing not to share! Thanks for the pix! :)
ReplyDeletedarling! is that pretty blue a spray paint...please say yes...
ReplyDeleteSooo cute and ingenius!!! (found you via Adventures in Renovating a Brooklynn Limestone).
ReplyDeleteyou are so bloody brilliant! i've never thought a school project could produce something that looks like that. amazing! and i love the aqua and gold. looks so luxurious! i hope you don't mind me putting on my blog/ inspiration board. give me a shout if you want me to remove ya.
ReplyDeleteOh, thank you for planning a tutorial! I will totally make some of these...amazing color choices !!
ReplyDeleteLove it! You are brilliant... the colors are perfect.
ReplyDeletexo,
cristin
love this and LOVE the gold & turquoise. Do you mind telling me how you got the edges so perfectly straight and the same height? Also, what gold paint did you use?
ReplyDeleteThanks!!!
Wow! How chic! Love the gold! It really looks expensive! The perfect un-crafty craft!
ReplyDeleteE + J
Love this idea! Did you spray paint it? Where did you find that light turquoise paint? it's gorgeous!
ReplyDeleteJust found your blog and I love it! Did you spray paint the tray? Where did you find that great light turquoise paint? It's beautiful! and just the color I'm looking for.
ReplyDelete